DIY Kids Picnic Table Plans (Build for Less Than 100) Making Manzanita
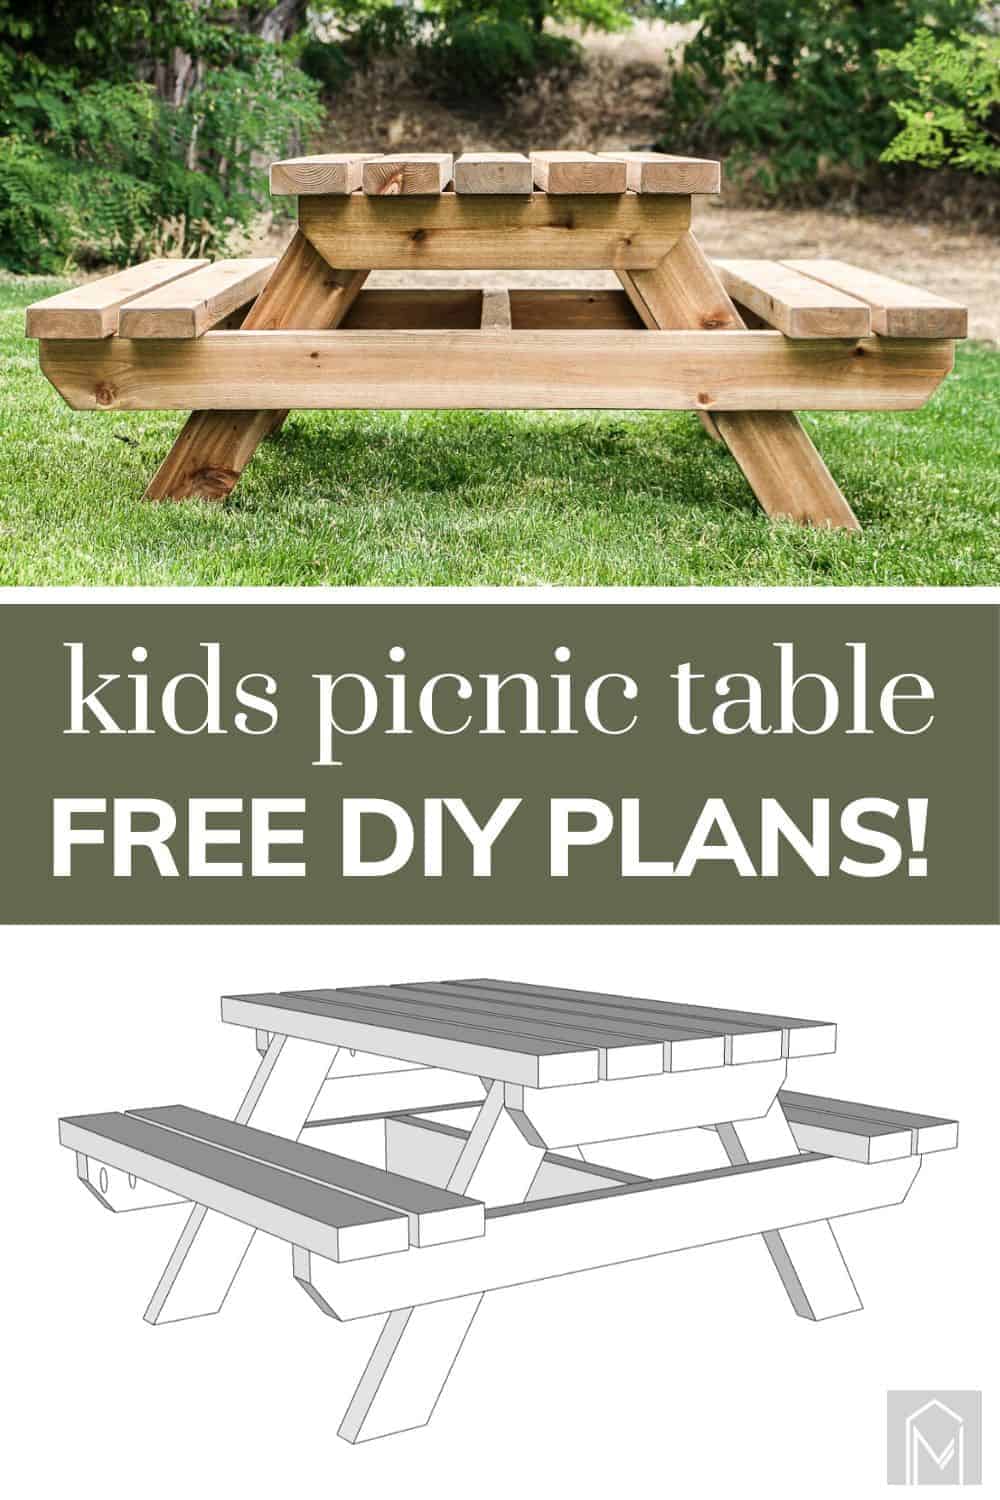
DIY Kids Picnic Table Plans (Build for Less Than 100) Making Manzanita
Measure down 1" from the top corner and 2" in from the bottom corner. Join the two spots with a line and cut a 38° angle on that line. Repeat on the other side to create a 2x4x21 ½" trapezoid. Repeat on the other 2x4x21 ½" piece. Take the [4] 2x4x25 ⅝" pieces cut in Prep Steps 5 and 6.

Kid size picnic table woodworking plan in 2021 Picnic table
Here's a free picnic table for a 6-foot long traditional picnic table. All you'll need is a saw, drill, screwdriver, wrench, and lumber. This 14-page picnic table plan will provide you with a materials list, written instructions, and lots of diagrams. Traditional 6 Foot Picnic Table Plan from Bob's Plans.

DIY Kids Picnic Table plans dimensions » Famous Artisan
Step 3: Cutting The Support Pieces. There are only two pieces that need to be cut for the lower supports of the bench and these are the 21 1/2" pieces. One end will have a 30.5 ° angle (miter) and the other will have a 59.5° angle (miter). The 37" piece will not need to be cut anymore and is ready to be attached.

Pin on Wood working
Cost to build this toddler picnic table. Not only was the picnic table super easy to build, but it was also pretty cheap too! Note: these costs are, of course, subject to change and may be different in your region. (10) 2×4 Cedar Premium Boards at $9.77 each - $97.70.

Kids Picnic Table Woodworking Project with Plans YouTube
Step 5. Flip the project over on a flat, level surface. Make sure the table doesn't wobble - if it does, adjust a "short" leg by unscrewing and rotating to make it longer, and reattaching with screws. Cut the corners off of the seat stringers at a 45 degree angle.

How to Build a Picnic Table with Attached Benches Diy picnic table
Stand the two frame assemblies up and screw the brace in the center of the end frames flush to the top with (2) 1 1/2" wood screws. Set the remaining boards in place (one seat per side and three top boards) centered on the supports, and screw them to the support pieces using 1 1/2" wood screws at each meeting of board and support.
Kids Wooden Picnic Table Plans How To build a Amazing DIY Woodworking
Step 4. Flip the table upside down and attach the center truss supports. The 48 degree end goes against the bottom of the tabletop. The 41 degree end goes against the inside of the seat supports. When you put the truss supports in place, they'll space each other correctly.

How to build a kids picnic table and sandbox combo DIY projects for
Step 1: Cut List. It's a short supply list: 8 Cedar 1" x 4" x 8' Deck Boards. 75 Deck Screws (1 5/8") Sandpaper and varnish or stain. Cut two trapezoidal seat supports, with the longer end at 33". Angle the ends at 22.5 degrees. Cut two trapezoidal tabletop supports, with the longer end at 17". Angle the ends at 22.5 degrees.

8 Easy And Cheap DIY Kids' Picnic Table Plans PicnicAdvice
Build a kid's sized picnic table today, download the guide:https://bit.ly/diy-kids-picnic-tableThis guide has everything you need. Detailed illustrations, ma.

Woodworkers Blog, Record Woodworking Vice Parts, Children
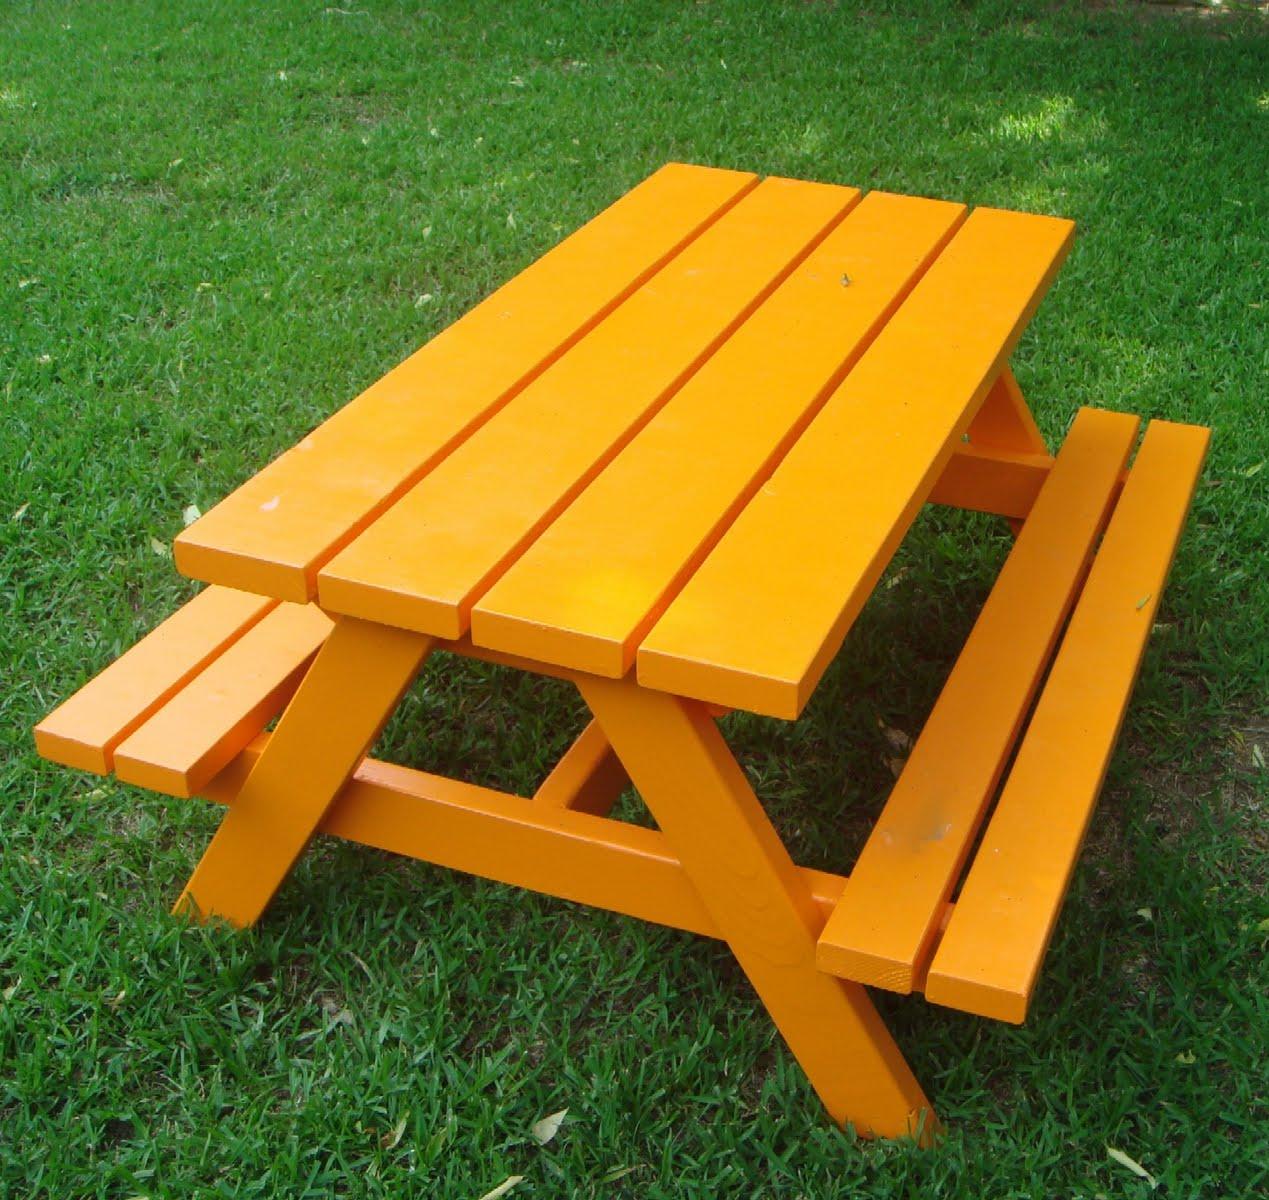
Make Ana's white picnic table that is easy to build and a perfect choice for your kids to spend quality playtime. All you need is wood, cutter, nails, clamps, deck screws, wood glue, cedar boards, wood stain and steal, white paint. ana white. 20. Outdoor Colorful Picnic Table.
Kids Picnic Table Plans Etsy
Use 3″ deck screws, screw through the seat (D) and into the bottom brace (C). Cut five 2×6 boards to 4′ for the table top (E). Assemble as shown in drawing above. Screw 3″ deck screws through the table top (E) and into the top brace (B). Cut two 2×4 boards for the center brace (F) to 1′ 8″. Cut 45 degree angle cuts on both ends.
:max_bytes(150000):strip_icc()/ana-white-free-picnic-table-plans-57f3d1753df78c690f573070-5bfd93a84cedfd0026029295.jpg)
15 Free Picnic Table Plans In All Shapes and Sizes
This table makes for a whimsical feature for your yard and hey, it's a good practice project before you take on a human-sized picnic table. Get the Charleston Crafted Squirrel Picnic Table Plans.
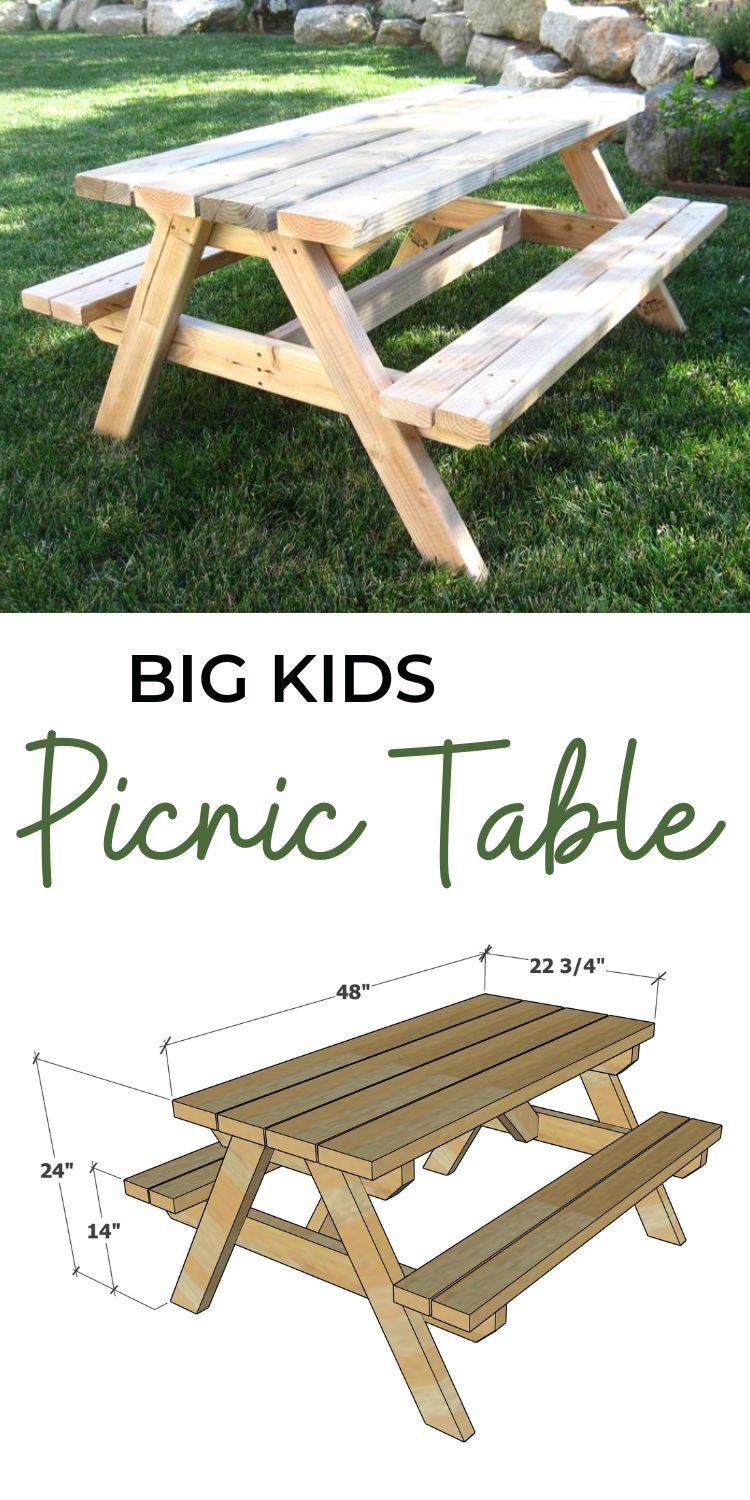
Big Kids Picnic Table Plans Ana White
Step 1: Building the side frames. Legs-for-the-picnic-table. The first step of the outdoor woodworking project is to build the back legs for the kids picnic table. Therefore, use 2×4 lumber and make 30 degree cuts to both ends, as shown in the diagram.

Kids Picnic Table Plans MyOutdoorPlans Free Woodworking Plans and
Step 2. Lay two of the 1x6 boards on top, with even 1-1/2" overhangs on ends and flush to outsides. Screw down with two screws per joint. Center the third tabletop board and screw down, also add a couple screws to the center support.

Cedar Kids' Picnic Table 8 Steps (with Pictures) Instructables
This pirate kids' picnic table looks just like a pirate ship. It's just a regular kids' picnic table at its core. But it has easy-to-make end caps that make it look like a true buccaneer's boat. It is a bit more difficult to make than a regular picnic table, but the instructions here are very easy to follow.

Childrens Picnic Table Free Woodworking
Drill pilot holes through the seat supports and insert 2 1/2″ screws into the tabletop supports. Fitting the supports. Fit 2×4 braces to the side legs of the picnic table. Cut both ends of the braes at the right angle. Align the edges with attention, drill pilot holes and secure the braces to the legs using 2 1/2″ screws.
